Learning the visual appearance of each letter in English and the sounds that each letter makes is an essential beginning step towards literacy.
In the Montessori approach, we do a huge array of spoken language activities with the children to prepare them for writing and reading. But we have one primary tool for teaching children the shapes of each letter and their individual sounds: the Sandpaper Letters.
The Presentation
Before you start, you always want to wake up the child’s fingertips. You’re also going to want to preserve the life of your letters. So, for both of these reasons, always begin Sandpaper Letter work by washing and thoroughly drying your hands. Then, draw the child’s awareness to the sensitivity at the ends of their fingers by using a sensitizing brush (available through Amazon). In my training, we used a small dish of water. We would dip our fingertips in and gingerly dry them with a tiny towel. Although it was really sweet, it was also a petri dish for infection.
Whatever you do, never use worksheets for tracing or copying letters unless you are an interventionist doing remedial work with an older child. Tracing the letters on the table, the air, sand tray, etc. requires the child to rely on muscle memory to create the letter and that is the key. Worksheets rely on drawing/visual matching; it is a completely different skill and uses different brain areas.
The general approach to the Sandpaper Letters is to choose three or four letters (depending on the interests and abilities of the child), show them how to trace a letter, say its sound, and then say a few words that feature that sound. The first time we choose letters, stick with pink and blue. We often encourage the children to choose the first letter of their name or their friend’s name, and we stick with the single pink (consonants) and blue (vowel) letters.
 For example, we would trace the M a few times (modeling how much we adore tracing it), say the sound ‘mmmmm’ after each trace, and then pause and say ‘mmmmm,’ ‘mmmmommmm,’ [pause long enough for the child to possibly step in] ‘mmmmoney,’ [pause again] ‘mmmmaybe,’ …” After each word, we pause and encourage the child to add more words that they like which feature the sound. The sound can be at the beginning, middle, or end of the word.
The Three-Period Lesson
Period 1: Tracing, as described above, is actually the first period of the famous Montessori Three-Period Lesson. After you’ve presented and traced each letter, touch each letter, and say its sound.
Period 2: Say a letter’s sound, and ask the child to find that letter. For example, you might say, “Show me the buh.” Keep it lively by varying the action in the second-period (e.g., point to the …, trace the …, move the …, pick up the…). The second period is where most learning takes place.
When the child accurately finds the sound you request most of the time, add distance to increase the challenge. Leave the letters on the table and move to a different place in the room. Ask the child to bring you a letter sound. Match your challenge to the child’s ability; better too easy than too hard. If they make an error, do not correct them. Instead, move back to the first period. For example, if they bring you the buh and you asked for the mmmm just say, “You brought me the buh.” Then, walk together back to the table and repeat the first period.
Period 3: When you are 100 percent sure that they know the sound, move on to the third period. Point to a letter and say, “What sound does this make?” This is the final test of their knowledge. It may take a day or weeks before they succeed at the third period. Don’t go here too soon.
An entire Sandpaper Lesson should only take a few minutes. Do not belabor it. Continue for as long as the child is interested and leave them wanting more!
Phonograms
After this first lesson (the presentation), we can stretch right out to include one pink consonant, one blue vowel, and one green phonogram in every lesson! That’s right, very young children can learn phonograms! (Phonograms represent sounds of a single or multiple letter group, i.e. e or augh.) In fact, it’s really important to include the phonograms at this early stage. For the young child, learning that two letters makes a certain sound is no different from learning that one letter makes a certain sound.
We adults like to hold phonograms off until later, but that is an error. The young child is incredibly interested in learning about letters and their sounds. We do them a disservice by restricting them to single letters. Why? Because in English you can’t make all of our words with just the single letters of our alphabet! You need s and h to make shoe. You need t and h to make thunder. If we don’t teach them the letters that go with those sounds, the child will realize that s/he doesn’t know part of our language. This omission lays the ground for the child feeling inferior or thinking that they aren’t good with language.
By teaching phonograms at this early stage, we prepare the child to start writing any word they like with the Moveable Alphabet. For more information on phonograms, see our blog post: Phonograms Made Easy. For more information on the Movable Alphabet, scan through our pedagogy blog for the different articles we’ve written about it. (As an aside, my graduate research at Harvard focused on the Movable Alphabet and its use as an indicator of developing literacy. If you’d like to go deep, read my thesis. I find this subject area fascinating.)
So, we use the three-period lesson as we trace a letter’s shape, say its sound, think of words that feature the sound, and challenge our students to find the letters that make each sound. Our goal is for them to recognize the sounds that each letter makes. So, if we asked them, “Can you find the lllll, they could go and find the letter l Once they can do that, we can introduce the Movable Alphabet (https://www.maitrilearning.com/collections/movable-alphabets) so that they can build words.
Additional Activities
Not every child just seamlessly moves from the 3-period lesson to being able to recognize all the sounds. They may resist having lessons with us. They may comply but fly quickly through the lesson to be “done with it.” If you’ve added distance to the 3-period lesson and they’re still not motivated, don’t worry. There are many other activities we can do with the Sandpaper Letters to arouse the child’s interest. You can read full details in our Sandpaper Letter Lesson plan. But for now, here’s a list to whet your whistle:
- Knock-knock game
- Trace the table/air
- Sorting
- Connections
- Blindfolded trace
- Link to the environment
You can start with the above activities once a child can recognize (at the second period) about half of the letter sounds. Inspire them to play one of these sandpaper letter games most days.
Remedial Lessons
With some children, even all of the above activities are not enough. Even with practice, they may mix up letters that they seemed to know the previous day. They may not be interested in tracing. It could be that they started when they were a little past their sensitive period (a time when they are physiologically driven to trace letter shapes). It could be that they have dyslexia. Or, it could just be that their interests lie elsewhere. In any event, we must help them persist so that they can learn the letter shapes and sounds. You will have to practice with them every day (just like brushing their teeth). There are many options for conducting these remedial lessons as shown below. Keep each day’s practice light, short, and fun. Repeat at least one letter every day. Choose no more than three letters at a time.
Here is a list of possibilities. Again, you can read the details in our Sandpaper Letter Lesson plan.
- Sand tray
- Small group
- Cued distance displays
- Mystery bag with letters
Whatever you do, never use worksheets for tracing or copying letters unless you are an interventionist doing remedial work with an older child. Tracing the letters on the table, the air, sand tray, etc. requires the child to rely on muscle memory to create the letter and that is the key. Worksheets rely on drawing/visual matching; it is a completely different skill and uses different brain areas.
I hope you find this useful!
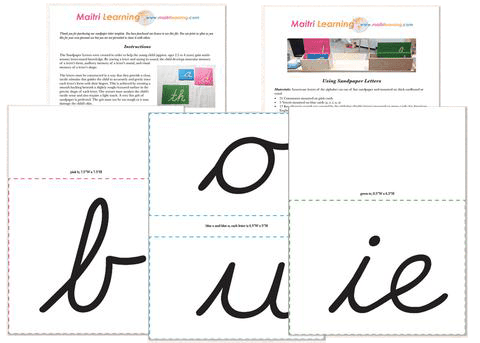
NOTE: If you don’t own a set of Sandpaper Letters, you can make them yourself using our downloadable template.